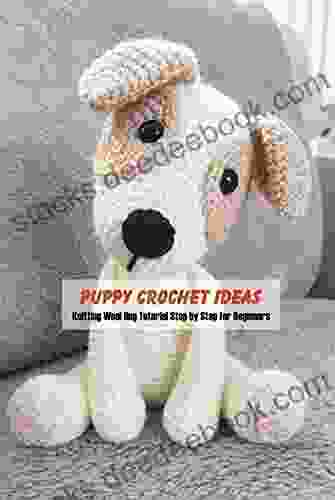
Knitting is a versatile and rewarding craft that can be used to create a wide variety of items, including cozy sweaters, scarves, blankets, and even toys. If you're a beginner, knitting a wool dog is a great project to start with. It's simple enough for beginners to follow, but it's also challenging enough to keep you engaged.
In this tutorial, we'll walk you through the steps of knitting a wool dog. We'll start with the basics of knitting, and then we'll move on to the specific steps for creating your furry friend.
5 out of 5
| Language | : | English |
| File size | : | 13498 KB |
| Text-to-Speech | : | Enabled |
| Enhanced typesetting | : | Enabled |
| Print length | : | 68 pages |
| Lending | : | Enabled |
| Screen Reader | : | Supported |
Materials
- Worsted weight yarn (two colors)
- Size 8 knitting needles
- Yarn needle
- Stuffing
- Two black buttons (for eyes)
- Pink embroidery thread (for nose and mouth)
Abbreviations
- K: knit
- P: purl
- CO: cast on
- BO: bind off
- St(s): stitch(es)
- Rnd(s): round(s)
Getting Started
The first step is to cast on 24 stitches. To do this, make a slip knot and place it on your left-hand needle. Hold the yarn tail in your right hand and insert the right-hand needle into the loop from back to front. Hook the yarn with the right-hand needle and pull it through the loop to create a new loop on the left-hand needle. Repeat this step until you have 24 stitches on your left-hand needle.
Once you have cast on 24 stitches, you're ready to start knitting. The first row is a knit row, which means you will knit into every stitch. To knit a stitch, insert the right-hand needle into the next stitch on the left-hand needle from left to right. Hook the yarn with the right-hand needle and pull it through the loop to create a new loop on the right-hand needle. Slip the old loop off the left-hand needle and onto the right-hand needle. Repeat this step until you have knit into all of the stitches on the row.
The next row is a purl row, which means you will purl into every stitch. To purl a stitch, insert the right-hand needle into the next stitch on the left-hand needle from right to left. Hook the yarn with the right-hand needle and pull it through the loop to create a new loop on the right-hand needle. Slip the old loop off the left-hand needle and onto the right-hand needle. Repeat this step until you have purled into all of the stitches on the row.
Continue knitting back and forth in this way for 12 rows.
Creating the Head
Once you have knit 12 rows, you're ready to start creating the head of your dog. To do this, you will need to decrease the number of stitches on the needles. To decrease a stitch, you will knit two stitches together. To knit two stitches together, insert the right-hand needle into the next two stitches on the left-hand needle from left to right. Hook the yarn with the right-hand needle and pull it through the two loops to create a new loop on the right-hand needle. Slip the old two loops off the left-hand needle and onto the right-hand needle. Repeat this step until you have decreased all of the stitches on the row.
You will now have 12 stitches on your needles. Knit one row without decreasing. On the next row, decrease one stitch at the beginning and end of the row. To decrease a stitch at the beginning of the row, knit two stitches together. To decrease a stitch at the end of the row, knit the last two stitches together. Repeat this step until you have decreased all of the stitches on the needles.
You will now have 6 stitches on your needles. Cut the yarn and thread it through the remaining stitches to bind them off.
Creating the Body
To create the body of your dog, you will need to cast on 24 stitches. Knit back and forth in garter stitch (knit every row) for 12 rows. On the next row, decrease one stitch at the beginning and end of the row. Repeat this step until you have decreased all of the stitches on the needles.
You will now have 6 stitches on your needles. Cut the yarn and thread it through the remaining stitches to bind them off.
Creating the Legs
To create the legs of your dog, you will need to cast on 12 stitches. Knit back and forth in garter stitch for 6 rows. On the next row, decrease one stitch at the beginning and end of the row. Repeat this step until you have decreased all of the stitches on the needles.
You will now have 6 stitches on your needles. Cut the yarn and thread it through the remaining stitches to bind them off.
Repeat this step to create the other three legs.
Creating the Tail
To create the tail of your dog, you will need to cast on 6 stitches. Knit back and forth in garter stitch for 3 rows. On the next row, decrease one stitch at the beginning and end of the row. Cut the yarn and thread it through the remaining stitches to bind them off.
Assembling the Dog
Now that you have all of the pieces of your dog, it's time to assemble it. Start by sewing the head to the body. Then, sew the legs to the body. Finally, sew the tail to the back of the body.
Finishing Touches
To finish your dog, you can add some details. For example, you can sew on some buttons for eyes and embroider a nose and mouth. You can also add some yarn hair.
Congratulations! You have now knitted your very own wool dog. Enjoy your new furry friend!
Tips
- If you're a beginner, it's a good idea to practice knitting a few stitches before you start on your dog. This will help you get the hang of the basic techniques.
- Don't be afraid to make mistakes. Everyone makes mistakes when they're first learning to knit. Just undo your stitches and try again.
- Be patient. Knitting takes time and practice. Don't get discouraged if you don't get it right the first time.
- Have fun! Knitting is a great way to relax and de-stress.
Knitting a wool dog is a fun and rewarding project for beginners. With a little patience and practice, you can create your very own furry friend. So what are you waiting for? Grab your knitting needles and get started!